Saturday, 28 May 2016

Step by Step SQL Server 2012 Installation

               Step by step installation of Microsoft SQL Server 2012


       1. Download SQL Server 2012

     http://www.microsoft.com/download/en/details.aspx?id=29066

      2. Create new user "sqladmin" in Active directory ( How to add New User to Active Directory)
  
      3. Add user SPAdmin to local administrator group which was created ( Active Directory User)

       4. Click on SQL Server 2012 Setup file

 
SQL Server Installation Center


       5. Click on New SQL Server stand alone installation.

 
New Installation Option


       6. Click on OK.

 
Setup Support Rule


    7. Enter Product key  and click Next.


    8.  Accept the License terms.


    9. Install updates or Unchecked select box and click Next.

 
Product


    10. Click Next.

 
Setup Support Rule


   11. Select SQL Server Feature Installation and click Next.

 
SQL Server Feature Installation


   12.  Select Database engine, SQL Server Replication, Full -Text and Semantic  Extractions for Search, Data Quality Service, Analysis Services, Reporting Services – Native, Reporting Services – SharePoint, Management Tools – Basic and Complete both 

and click Next.

 
Instance Feature


    13. Click Next.

 
Installation Rule

    14. Continue as default instance and Click Next.

 
Instance Create


    15. Click Next.

    16. Add Service account in Active directory for

                   SQL Server Database Engine 

                  SQL Server Agent  .

                  SQL Server Analysis Service .

 
Service Accounts

     17. Click Next.


     18. Select Mixed Mode SQL Server authentication and put password for sa account.

      Click Add Current User button to add current user as SQL Server admin.

 
Server


     19. Click Next.


     20. Enter SQL Analysis service account as admin for Analysis service access. Then Click Next.

 
Analysis Service


     21. Select Install only option for Reporting service then Click Next.

 
Reporting Service

      22.  Click Next.


     23.  Click Next.


     24.  Click Install.

 
Install


      Installation done!


Thank you very much

          Fahadullah Karimi

         SharePoint Specialist

Active Directory Configuration on Windows Server 2012Install Online/Offline prerequisites for SharePoint Server 2013

Thursday, 26 May 2016

Active Directory Configuration on Windows Server 2012

        Follow the steps to Configure Active Directory on Windows Server 2012

                 1. Open Server manager-> Click on Add roles and features


Add Role

               2. Click on Next


Add Feature

            3. Select Role base or feature based installation option then click next.

Role

         4. Select Server from the Server pool and click Next.


Server

      5. Select check box option "Active Directory Domain Services" 


Check

     6. To add prerequisite features for AD services.


          Click on Add features button. 


Add Feature

    7. Click Next


Confirm

    8. Click Install button.

After installation, promote this server to domain controller.


Click on "Promote this server to domain controller".

Promotead

     9. Select option "Add a new forest"

 and enter fully qualified domain name. I’ve put "fahadullah.com".


Domain


    10. Click Next


Service

   11. Enter Password for Directory Service Restore Mode, then Click Next.


delegate


   12. Click Next.


Net bios Name

    13. Click Next.


Add

     14. Click Next.

Review Selection

      15. Click Next.


domain credential

                    Add User to Active Directory

     16. Server Manager -> Tools- > Active Directory Users and Computers.


Server

       17. Active Directory Users and Computers\ domain node \ folder


Point to New, and then click User .


New User

     18.  Click on Check box "Password never expires” and Uncheck "Users must change Password at next logon" .


New User Password


Thank you very much

          Fahadullah Karimi

         SharePoint Specialist

Step by step Windows Server 2012 Server InstallationStep by Step SQL Server 2012 Installation

Wednesday, 25 May 2016

Step by step Windows Server 2012 Server Installation

 Step by step Windows Server 2012 Server Installation


              1. Boot from Windows Server 2012 DVD.

Press any key


              2. Wait for a while for loading the setup files,

 
Wait for setup loads

          
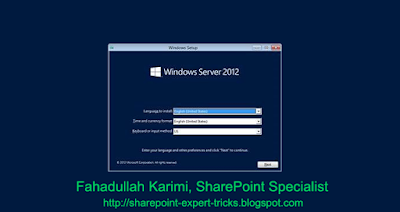
3. After the setup files are loaded, Set Time and currency format, I have selected the default values 


Set Time Currency Keyboard


     4. Click Next, Then Start the installation by Click "Install now" button


Install Now

     5. Wait for loading


Setup Starting

     6. Select the Operation System to install


Select OS

     7.  Read the License terms and I accept the license terms and click Next


License Terms

    8. Select "Custom Installation"


Custom Install

    9. Click Next

Drive Information

     10. Installation process will start 


Installing

    11. Machine will reboot couple of times between installations. Enter  password for the Administrator user

 
Administrator


    12. The setup will finalize your settings, might take a couple of minutes


Finalizing


      13. Press Ctrl + Alt + Delete to sign in 


Ctrl Alt Delete


Thank you very much

          Fahadullah Karimi

         SharePoint Specialist

Step by Step complete installation and configuration SharePoint Server 2013Active Directory Configuration on Windows Server 2012